

Harvesting peanuts, even without a sprawling garden, is absolutely achievable! Have you ever dreamt of enjoying freshly dug, homegrown peanuts, roasted to perfection, without needing acres of farmland? Well, dream no more! This DIY guide unlocks the secrets to successfully harvesting peanuts, even if you’re limited to containers on a balcony or a small patio.
Peanuts, originating in South America, have a rich history as a staple food source and a symbol of prosperity in many cultures. From ancient Incan civilizations to modern-day snack enthusiasts, the humble peanut has nourished and delighted people for centuries. But you don’t need to be an expert farmer to enjoy the fruits (or rather, the nuts!) of your labor.
Many people shy away from growing peanuts because they believe it requires vast amounts of space and specialized knowledge. But that’s simply not true! This DIY article will demystify the process and provide you with simple, step-by-step instructions on how to harvest peanuts successfully, regardless of your gardening experience or the size of your growing area. I’m going to show you how to get a bountiful harvest, even if you think you don’t have enough space. Get ready to enjoy the satisfaction of growing and harvesting your own delicious peanuts!
Growing Peanuts Indoors: From Seed to Snack (Even Without a Garden!)
Okay, so you’re craving fresh, homegrown peanuts, but you don’t have a garden? No problem! I’m going to show you how to cultivate these delicious legumes right inside your home. It might sound a little crazy, but trust me, it’s totally doable and incredibly rewarding. Get ready to impress your friends with your indoor peanut-growing prowess!
What You’ll Need: The Peanut-Growing Arsenal
Before we dive in, let’s gather our supplies. This is crucial for a smooth and successful peanut-growing journey.
* Raw, Unroasted Peanuts: This is the most important ingredient! Make sure they’re raw and unroasted, preferably with the shells still on. You can usually find these at health food stores or online. Avoid salted or flavored peanuts, as they won’t germinate.
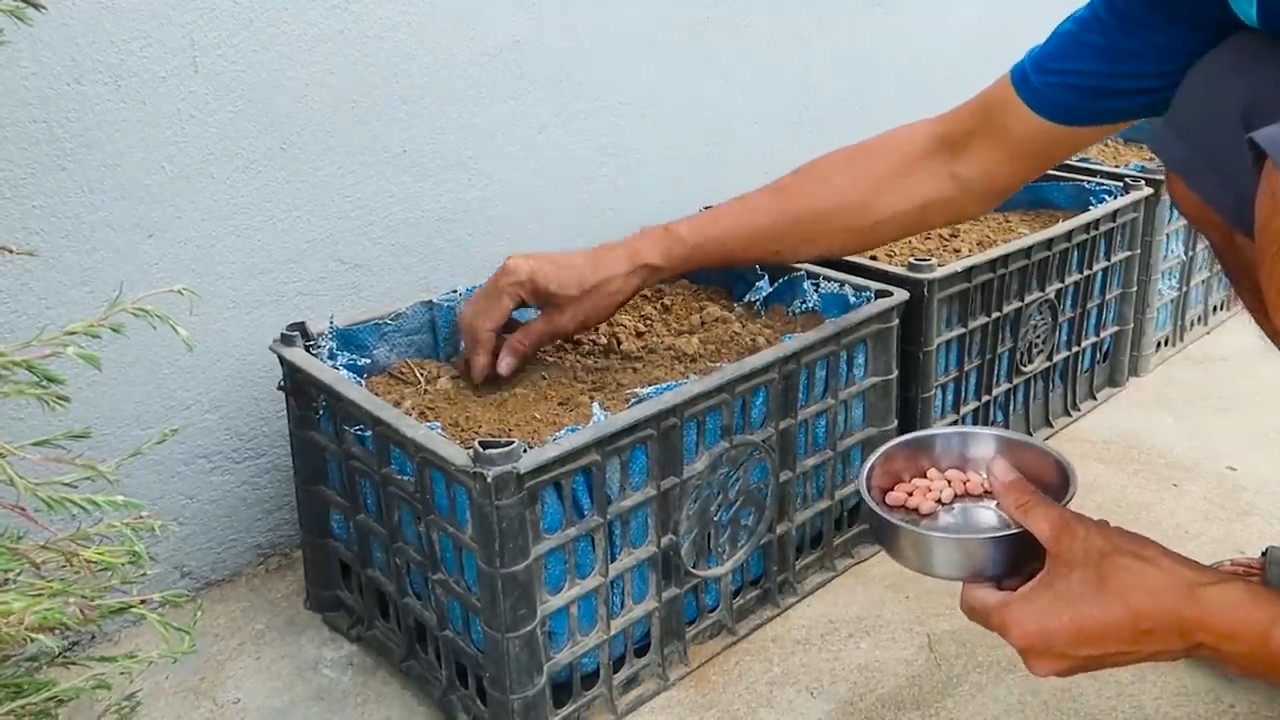
* Large Container: We’re talking big here! A container at least 12 inches deep and 12 inches wide is ideal. Peanuts need room to spread their roots and for the “pegs” (where the peanuts develop) to bury themselves in the soil.
* Well-Draining Potting Mix: This is key to preventing root rot. A mix specifically designed for containers is best. You can also amend regular potting mix with perlite or vermiculite to improve drainage.
* Water: Essential for life, of course!
* Grow Lights (Optional, but Recommended): While peanuts can grow indoors with natural light, grow lights will significantly improve your yield and the overall health of your plants, especially if you don’t have a super sunny spot.
* Spray Bottle: For misting the seedlings.
* Small Pots or Seed Trays: For starting the peanut seeds.
* Heat Mat (Optional): Peanuts love warmth, so a heat mat can help speed up germination.
* Patience: This is a long-term project, so be prepared to wait!
Phase 1: Sprouting Your Peanut Seeds
This is where the magic begins! We need to wake up those dormant peanuts and get them ready to grow.
1. Soaking the Peanuts: Place your raw peanuts in a bowl of lukewarm water. Let them soak for 24-48 hours. This helps soften the shells and encourages germination. You’ll notice some peanuts might start to crack open – that’s a good sign!
2. Preparing the Seed Starting Pots: Fill your small pots or seed trays with the well-draining potting mix. Moisten the soil thoroughly, but don’t let it get soggy.
3. Planting the Peanuts: Gently push each peanut about 1-2 inches deep into the soil. If the peanut has already started to sprout, position it with the sprout pointing upwards.
4. Creating a Warm Environment: Place the pots or trays on a heat mat (if you have one) and cover them with a clear plastic lid or plastic wrap to create a humid environment. This will help retain moisture and warmth.
5. Finding the Right Spot: Place the pots in a warm location with indirect sunlight. If you’re using grow lights, position them a few inches above the pots.
6. Maintaining Moisture: Keep the soil consistently moist, but not waterlogged. Use a spray bottle to mist the soil regularly.
7. Waiting for Sprouts: Be patient! It can take anywhere from 7 to 14 days (or even longer) for the peanuts to sprout. Once you see little green shoots emerging, remove the plastic lid or wrap.
Phase 2: Transplanting and Growing Your Peanut Plants
Now that we have seedlings, it’s time to give them more space to thrive.
1. Preparing the Large Container: Fill your large container with the well-draining potting mix. Leave a few inches of space at the top.
2. Carefully Transplanting: Once your peanut seedlings have developed a few sets of true leaves (the leaves that look like miniature peanut leaves), they’re ready to be transplanted. Gently remove the seedlings from their small pots, being careful not to damage the roots.
3. Spacing the Plants: Plant the seedlings about 6-8 inches apart in the large container. This will give them enough room to spread out.
4. Watering After Transplanting: Water the newly transplanted seedlings thoroughly.
5. Providing Adequate Light: Place the container in a location that receives at least 6-8 hours of direct sunlight per day. If you’re using grow lights, keep them on for 12-16 hours per day.
6. Watering Regularly: Peanuts need consistent moisture, especially during flowering and peanut development. Water deeply whenever the top inch of soil feels dry to the touch.
7. Fertilizing (Optional): You can fertilize your peanut plants every few weeks with a balanced liquid fertilizer. Follow the instructions on the fertilizer label. However, be careful not to over-fertilize, as this can lead to excessive foliage growth and fewer peanuts.
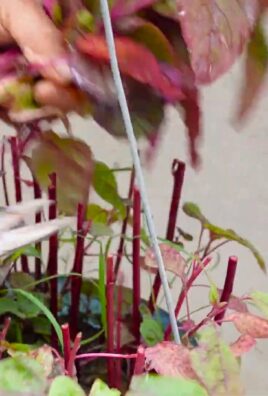
8. Hilling the Soil: As your peanut plants grow, you’ll notice small “pegs” (also called gynophores) emerging from the base of the plant. These pegs are what will eventually develop into peanuts. To encourage peanut development, gently hill the soil around the base of the plants, covering the pegs with soil. This gives them a dark, moist environment to grow in.
Phase 3: Harvesting Your Homegrown Peanuts
The moment we’ve all been waiting for! Harvesting your own peanuts is incredibly satisfying.
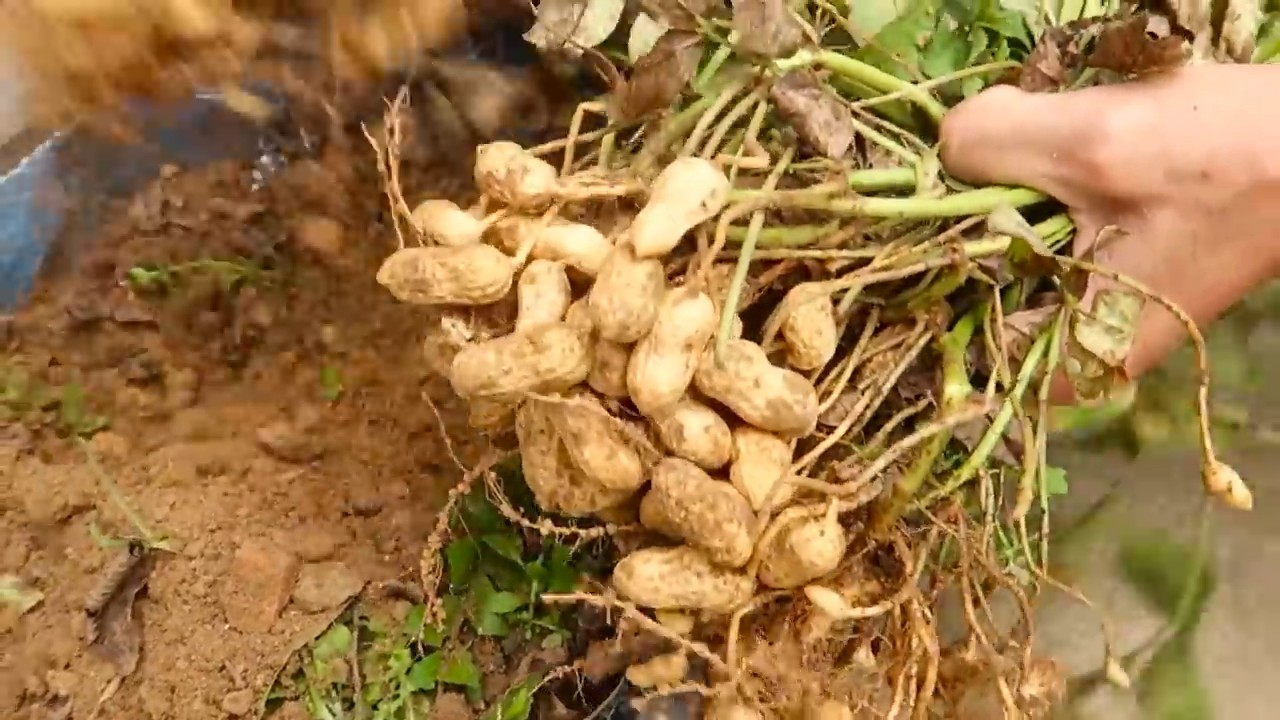
1. Knowing When to Harvest: Peanuts typically take about 120-150 days to mature. A good indicator that they’re ready to harvest is when the foliage starts to turn yellow and brown. You can also dig up a few plants to check the peanuts. The shells should be hard and the kernels inside should be plump and well-formed.
2. Carefully Digging Up the Plants: Gently loosen the soil around the base of the plants with a trowel or shovel. Then, carefully lift the entire plant out of the container, being careful not to break off any peanuts.
3. Cleaning the Peanuts: Shake off as much soil as possible from the peanuts. Then, rinse them with water to remove any remaining dirt.
4. Curing the Peanuts: This is an important step to ensure that your peanuts are properly dried and stored. Spread the peanuts out in a single layer on a screen or tray in a well-ventilated area. Allow them to cure for 2-3 weeks, or until the shells are completely dry and brittle.
5. Storing Your Peanuts: Once the peanuts are cured, you can store them in an airtight container in a cool, dry place. They should last for several months.
Troubleshooting: Common Peanut-Growing Problems
Even with the best care, you might encounter a few challenges along the way. Here are some common problems and how to address them:
* Poor Germination: If your peanuts aren’t sprouting, make sure they’re raw and unroasted. Also, ensure that the soil is warm and moist. You can try soaking the peanuts for a longer period of time.
* Yellowing Leaves: Yellowing leaves can be a sign of nutrient deficiency. Try fertilizing your plants with a balanced liquid fertilizer. It could also be a sign of overwatering, so make sure the soil is well-draining.
* Lack of Peanuts: If your plants are growing well but not producing peanuts, it could be due to insufficient light or poor pollination. Make sure your plants are getting enough sunlight or use grow lights. You can also try hand-pollinating the flowers by gently shaking the plants.
* Root Rot: Root rot is caused by overwatering and poor drainage. Make sure your soil is well-draining and avoid overwatering. If you suspect root rot, you can try transplanting your plants into fresh soil.
* Pests: While less common indoors, pests like aphids or spider mites can sometimes attack peanut plants. Inspect your plants regularly and treat any infestations with insecticidal soap or neem oil.
Tips for Success: Peanut-Growing Pro Hacks
Here are a few extra tips to help you become a peanut-growing master:
* Choose the Right Variety: Some peanut varieties are better suited for indoor growing than others. Look for varieties that are compact and early-maturing.
* Provide Support: As your peanut plants grow, they may need some support. You can use stakes or a trellis to help keep them upright.
* Rotate Your Crops: If you plan to grow peanuts in the same container year after year, it’s a good idea to rotate your crops to prevent soilborne diseases.
* Enjoy the Process! Growing peanuts indoors is a fun and rewarding experience. Don’t be afraid to experiment and learn from your mistakes.
Growing peanuts indoors is a unique and rewarding experience. With a little patience and care
Conclusion
So, you’ve reached the end of our guide on harvesting peanuts without a garden! By now, you should be armed with the knowledge and confidence to enjoy freshly harvested peanuts, even if you don’t have acres of farmland at your disposal. This DIY trick isn’t just about saving money; it’s about connecting with the food you eat, understanding the process from seed to snack, and experiencing the unique satisfaction of growing your own.
Why is this a must-try? Because it democratizes peanut cultivation. It removes the barrier of needing a large garden, making it accessible to apartment dwellers, balcony gardeners, and anyone with a sunny windowsill. Imagine the delight of sharing homegrown peanuts with friends and family, knowing you nurtured them from start to finish. The taste of freshly harvested, homegrown peanuts is simply unparalleled – sweeter, nuttier, and bursting with flavor compared to store-bought varieties.
But the benefits extend beyond taste. This method is incredibly educational, especially for children. It teaches them about plant life cycles, the importance of patience, and the rewards of hard work. Plus, it’s a fantastic conversation starter!
Don’t be afraid to experiment! Once you’ve mastered the basic container method, consider exploring different peanut varieties. Virginia peanuts are known for their large size, while Spanish peanuts offer a sweeter flavor. You can also try roasting your harvested peanuts with different spices – chili powder, smoked paprika, or even a touch of cinnamon for a sweet and savory treat.
Another variation to consider is the type of container you use. While we recommended a large pot, you could also try using a grow bag. Grow bags offer excellent drainage and aeration, which can be beneficial for peanut growth. Just ensure the bag is large enough to accommodate the developing peanut pods.
We understand that harvesting peanuts without a garden might seem daunting at first, but we promise it’s easier than you think. The key is to provide the right conditions – plenty of sunlight, well-draining soil, and consistent watering. With a little patience and care, you’ll be rewarded with a bountiful harvest of delicious, homegrown peanuts.
We wholeheartedly encourage you to give this DIY trick a try. It’s a fun, rewarding, and educational experience that will connect you with nature and provide you with a delicious snack. And most importantly, we want to hear about your experience! Share your photos, tips, and stories with us in the comments below. Let’s build a community of urban peanut farmers and inspire others to discover the joy of growing their own food, no matter where they live. Let us know what worked for you, what challenges you faced, and any creative solutions you came up with. Your feedback will help us refine this guide and make it even more helpful for future readers. So, get planting, get harvesting, and get sharing! Let’s spread the peanut-growing love!
Frequently Asked Questions (FAQ)
What kind of soil is best for growing peanuts in containers?
Peanuts thrive in well-draining, sandy loam soil. Avoid heavy clay soils, as they can become compacted and hinder peanut development. You can purchase a pre-mixed potting mix specifically designed for vegetables, or you can create your own by combining equal parts potting soil, sand, and compost. The key is to ensure good drainage to prevent root rot. Adding perlite or vermiculite to the soil mix can also improve drainage and aeration. Remember, healthy soil equals healthy peanuts!
How much sunlight do peanuts need when grown indoors or on a balcony?
Peanuts are sun-loving plants and require at least 6-8 hours of direct sunlight per day. If you’re growing them indoors, place them near a south-facing window where they can receive ample sunlight. If you don’t have enough natural light, consider supplementing with a grow light. On a balcony, position your containers in the sunniest spot available. Rotate the containers regularly to ensure even sun exposure on all sides of the plant. Insufficient sunlight can lead to weak growth and reduced peanut production.
How often should I water my peanut plants in containers?
Water your peanut plants regularly, keeping the soil consistently moist but not waterlogged. Check the soil moisture level daily by sticking your finger about an inch into the soil. If it feels dry, it’s time to water. Water deeply, allowing the water to drain out of the bottom of the container. Avoid overhead watering, as this can promote fungal diseases. During hot, dry weather, you may need to water more frequently. Conversely, during cooler, wetter weather, you may need to water less often. Proper watering is crucial for healthy peanut growth and pod development.
How long does it take to harvest peanuts after planting?
Peanuts typically take 120-150 days to mature, depending on the variety and growing conditions. You’ll know it’s time to harvest when the foliage starts to turn yellow and the lower leaves begin to die back. You can also dig up a test plant to check the peanut pods. The pods should be plump and well-filled, with a mature peanut inside. If the pods are still small and immature, wait a few more weeks before harvesting. Patience is key when it comes to harvesting peanuts.
What are some common problems I might encounter when growing peanuts in containers, and how can I fix them?
One common problem is yellowing leaves, which can be caused by nutrient deficiencies. Fertilize your plants with a balanced fertilizer every few weeks to provide them with the nutrients they need. Another problem is pests, such as aphids or spider mites. Inspect your plants regularly and treat any infestations promptly with insecticidal soap or neem oil. Root rot can also be a problem if the soil is not well-draining. Ensure your containers have drainage holes and avoid overwatering. By addressing these potential problems early on, you can ensure a healthy and productive peanut harvest.
Can I grow peanuts in a hanging basket?
While technically possible, growing peanuts in a hanging basket is not ideal. Peanuts produce their pods underground, and the limited space in a hanging basket can restrict their development. You’re better off using a larger container, such as a pot or grow bag, to provide ample space for the peanuts to grow.
What do I do with the peanut plants after harvesting the peanuts?
After harvesting the peanuts, you can compost the peanut plants. They are a good source of organic matter and will enrich your compost pile. Alternatively, you can chop up the plants and use them as mulch around other plants in your garden.
How do I cure and store my harvested peanuts?
After harvesting, shake off any excess soil and allow the peanuts to dry in a well-ventilated area for several weeks. You can spread them out on a screen or hang them in mesh bags. Once the peanuts are completely dry, store them in an airtight container in a cool, dry place. Properly cured and stored peanuts can last for several months.
Is it possible to grow peanuts indoors year-round?
Yes, it is possible to grow peanuts indoors year-round, provided you can provide them with the necessary conditions – ample sunlight (or grow lights), well-draining soil, and consistent watering. However, it may be more challenging than growing them outdoors during the warmer months. You may need to adjust your watering and fertilizing schedule to account for the different growing conditions.
What are the best peanut varieties to grow in containers?
Some of the best peanut varieties to grow in containers include Spanish peanuts, Valencia peanuts, and Virginia peanuts. Spanish peanuts are smaller and mature quickly, making them a good choice for container gardening. Valencia peanuts are known for their sweet flavor and are also well-suited for containers. Virginia peanuts are larger and take longer to mature, but they can still be grown successfully in containers with proper care. Choose a variety that suits your taste and growing conditions.
Leave a Comment