

Styrofoam for Bok Choy Growth: Unlock the secrets to a bountiful harvest with this surprisingly simple DIY trick! Have you ever dreamed of rows of vibrant, healthy Bok Choy flourishing in your own backyard, even if you’re short on space or dealing with challenging soil conditions? I know I have! For centuries, gardeners have sought innovative ways to optimize their yields, and while Styrofoam might seem like an unconventional gardening tool, it holds the key to unlocking impressive Bok Choy growth.
In some Asian cultures, Bok Choy is more than just a vegetable; it’s a symbol of good fortune and prosperity, often featured in celebratory dishes. But achieving that perfect, crisp texture and vibrant green color can be tricky. That’s where this ingenious hack comes in. Using Styrofoam for Bok Choy growth offers a fantastic solution for improving drainage, regulating soil temperature, and even creating a mini-hydroponic system in your garden.
This DIY project is perfect for beginner gardeners and seasoned pros alike. I’m excited to share how this simple, inexpensive material can revolutionize your Bok Choy cultivation, leading to healthier plants and a more abundant harvest. So, let’s dive in and discover how to transform your garden with the power of Styrofoam!

DIY Styrofoam Raft for Hydroponic Bok Choy: A Beginner’s Guide
Hey there, fellow gardening enthusiasts! I’m super excited to share a fun and easy DIY project that will let you grow delicious bok choy right at home, even if you don’t have a traditional garden. We’re going to build a simple hydroponic raft using styrofoam – a fantastic way to get fresh veggies with minimal space and effort. Trust me, it’s easier than you think!
What is Hydroponics, Anyway?
Before we dive in, let’s quickly touch on hydroponics. It’s basically growing plants without soil, using nutrient-rich water solutions. This method allows you to control the environment, optimize nutrient delivery, and often results in faster growth and higher yields. Our styrofoam raft will act as a floating platform for our bok choy, allowing the roots to dangle in the nutrient solution.
Why Styrofoam?
Styrofoam is an excellent choice for this project because it’s lightweight, buoyant, readily available (often recycled!), and doesn’t decompose easily in water. Plus, it’s super easy to cut and work with.
Materials You’ll Need
Okay, let’s gather our supplies. Here’s what you’ll need to build your own bok choy hydroponic raft:
* Styrofoam Sheet: Look for a sheet that’s at least 1-2 inches thick. The size will depend on how many bok choy plants you want to grow. A good starting size is around 12 inches by 24 inches. You can often find these at craft stores, hardware stores, or even recycle packaging materials.
* Plastic Container: This will be your reservoir for the nutrient solution. Choose a container that’s slightly larger than your styrofoam sheet. A plastic storage bin works perfectly. Make sure it’s food-grade if possible.
* Net Cups: These are small, slotted cups that will hold your bok choy seedlings. You can find these online or at hydroponic supply stores. 2-inch net cups are a good size for bok choy.
* Hydroponic Nutrients: You’ll need a balanced nutrient solution specifically formulated for leafy greens. These are readily available online or at garden centers. Follow the instructions on the label carefully.
* Bok Choy Seeds or Seedlings: You can start from seeds or purchase small seedlings from a nursery. Starting from seeds will take longer, but it’s more cost-effective.
* Rockwool Cubes or Coco Coir: These are inert growing mediums that will support your seedlings in the net cups.
* Utility Knife or Serrated Knife: For cutting the styrofoam. Be careful!
* Measuring Tape or Ruler: For accurate measurements.
* Marker or Pen: For marking the styrofoam.
* Drill or Hole Saw (optional): If you want perfectly round holes for your net cups. A utility knife can also work.
* Air Pump and Air Stone (optional, but recommended): To oxygenate the nutrient solution. This promotes healthy root growth.
* pH Meter (optional, but recommended): To monitor the pH of the nutrient solution. Bok choy prefers a slightly acidic pH.
* pH Up and pH Down Solutions (optional, but recommended): To adjust the pH of the nutrient solution if needed.
Step-by-Step Instructions: Building Your Hydroponic Raft
Alright, let’s get building! Here’s a detailed guide to creating your styrofoam raft:
1. Prepare the Styrofoam Sheet
* Measure and Cut: First, measure the inside dimensions of your plastic container. You want the styrofoam sheet to fit snugly inside, but not too tightly. Subtract about 1/4 inch from each side to allow for easy insertion and removal. Use your measuring tape and marker to mark the cutting lines on the styrofoam.
* Cut the Styrofoam: Carefully use your utility knife or serrated knife to cut along the marked lines. It’s best to make several shallow cuts rather than trying to cut all the way through in one go. This will help prevent the styrofoam from breaking. Safety first! Always cut away from yourself and use a cutting surface.
* Smooth the Edges (Optional): If the edges are rough, you can lightly sand them down with sandpaper for a cleaner look.
2. Create the Net Cup Holes
* Determine Hole Spacing: Decide how many bok choy plants you want to grow on your raft and space the holes accordingly. A good rule of thumb is to leave at least 4-6 inches between each hole to allow for adequate growth.
* Mark the Hole Locations: Use your measuring tape and marker to mark the center of each hole on the styrofoam sheet.
* Cut the Holes: This is where the drill or hole saw comes in handy. If you have one, use a hole saw that’s slightly smaller than the diameter of your net cups. This will ensure a snug fit. If you don’t have a drill, you can carefully use your utility knife to cut out the holes. Start by making a small pilot hole in the center, then gradually enlarge it until it’s the right size. Take your time and be careful not to cut yourself.
* Test the Fit: Once you’ve cut all the holes, test the fit of your net cups. They should fit snugly but not be too tight.
3. Prepare the Nutrient Reservoir
* Clean the Container: Thoroughly clean your plastic container with soap and water to remove any dirt or debris. Rinse it well.
* Add Nutrient Solution: Fill the container with water, leaving a few inches of space at the top. Add your hydroponic nutrients according to the instructions on the label. It’s crucial to follow the instructions carefully to avoid over- or under-fertilizing your plants.
* Check and Adjust pH (Optional but Recommended): Use your pH meter to check the pH of the nutrient solution. Bok choy prefers a pH between 6.0 and 7.0. If the pH is too high or too low, use pH up or pH down solutions to adjust it accordingly. Always add pH adjusting solutions in small increments and recheck the pH after each addition.
4. Prepare the Seedlings
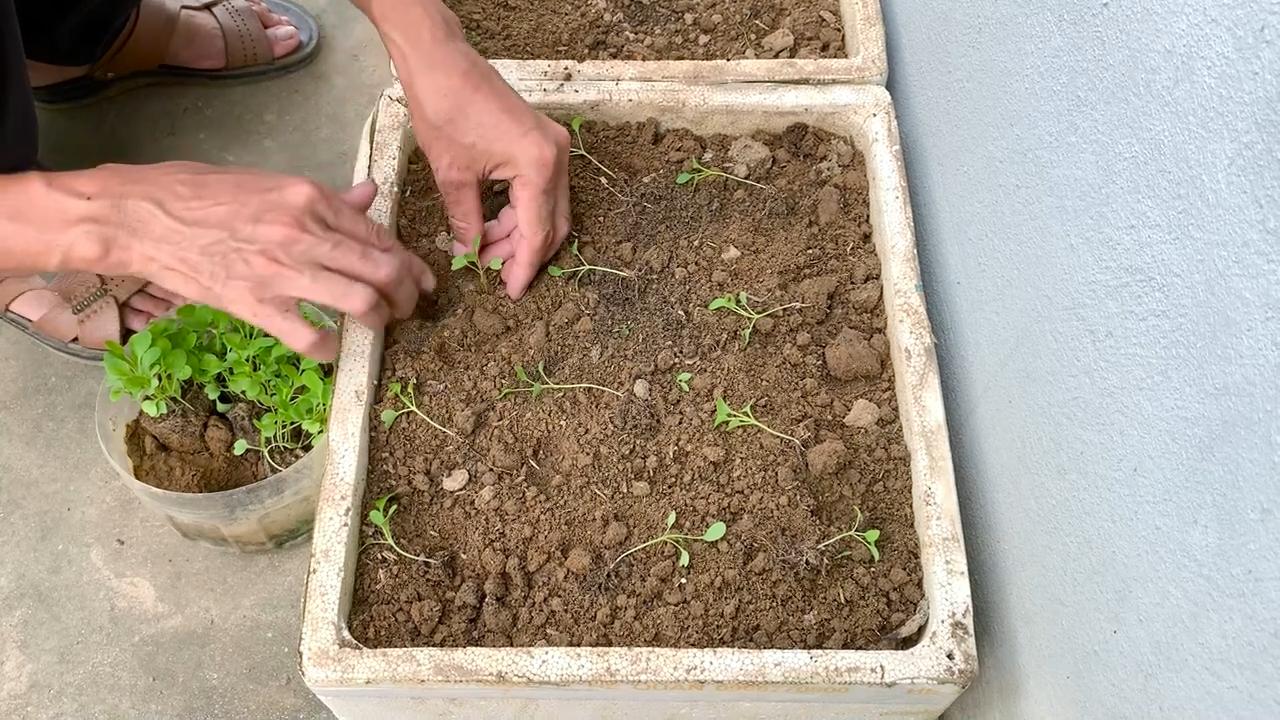
* Starting from Seeds: If you’re starting from seeds, sow them in rockwool cubes or coco coir. Moisten the growing medium and place the seeds in the center. Keep the cubes moist and in a warm, well-lit location until the seedlings emerge. This usually takes a few days.
* Using Seedlings: If you’re using seedlings, gently remove them from their containers and rinse off any excess soil from the roots.
* Place Seedlings in Net Cups: Carefully place the seedlings in the net cups, surrounding the roots with rockwool cubes or coco coir to provide support. Make sure the roots are dangling down through the slots in the net cups.
5. Assemble the Hydroponic Raft
* Float the Raft: Gently place the styrofoam raft on top of the nutrient solution in the plastic container.
* Insert Net Cups: Insert the net cups with the seedlings into the holes in the styrofoam raft. Make sure the roots are submerged in the nutrient solution.
6. Add Air Stone (Optional but Highly Recommended)
* Place Air Stone: If you’re using an air pump and air stone, place the air stone at the bottom of the nutrient reservoir.
* Connect Air Pump: Connect the air stone to the air pump with tubing.
* Turn on Air Pump: Plug in the air pump and turn it on. You should see bubbles rising from the air stone, which will help oxygenate the nutrient solution.
Maintaining Your Hydroponic Bok Choy
Now that your hydroponic raft is assembled, here’s how to keep your bok choy happy and healthy:
* Light: Bok choy needs plenty of light to grow. Place your hydroponic system in a location that receives at least 6 hours of direct sunlight per day. If you don’t have enough natural light, you can supplement with grow lights.
* Nutrient Solution: Monitor the nutrient solution regularly and replenish it as needed. You may need to add more nutrients every few weeks, depending on the growth rate of your plants.
* pH: Check the pH of the nutrient solution regularly and adjust it as needed.
* Water Level: Make sure the water level in the reservoir is high enough to keep the roots submerged.
* Pest Control: Keep an eye out for pests and diseases. If you notice any problems, take action immediately to prevent them from spreading.
* Harvesting: You can start harvesting your bok choy when the leaves are about 6-8 inches long. Simply cut off the outer leaves as needed, leaving the inner leaves to continue growing.
Troubleshooting Tips
* Yellow
Conclusion
So, there you have it! Transforming simple styrofoam into a thriving bok choy garden is not just a clever DIY project; it’s a sustainable and surprisingly effective way to cultivate your own fresh produce, even in limited spaces. We’ve explored the ease of creating these floating planters, the benefits they offer in terms of water conservation and root aeration, and the sheer joy of watching your bok choy flourish in a unique and innovative environment.
Why is this DIY trick a must-try? Because it democratizes gardening. It removes the barriers of large plots of land, expensive equipment, and complicated techniques. It’s accessible to apartment dwellers, balcony gardeners, and anyone looking for a fun and rewarding way to connect with nature. Plus, it’s a fantastic way to repurpose styrofoam that might otherwise end up in a landfill, contributing to a more eco-conscious lifestyle.
But the beauty of this method lies in its adaptability. Feel free to experiment with different sizes and shapes of styrofoam. Consider painting the styrofoam with non-toxic, waterproof paint to add a splash of color to your garden. You could even create a tiered system by stacking styrofoam platforms of varying heights, creating a visually stunning and space-efficient display.
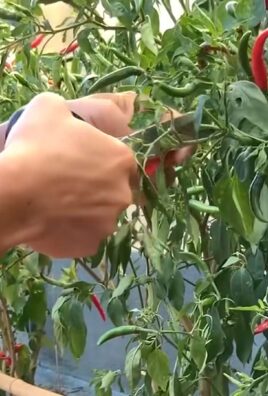
Beyond bok choy, this method can be adapted for other shallow-rooted leafy greens like lettuce, spinach, or even herbs like basil and mint. Just be sure to adjust the nutrient solution accordingly to meet the specific needs of each plant. You can also experiment with different types of containers to hold the nutrient solution, from repurposed plastic tubs to decorative ceramic pots. The possibilities are truly endless!
This styrofoam for bok choy growth method is a game-changer for urban gardeners. It’s a testament to the power of ingenuity and a reminder that even the simplest materials can be transformed into something beautiful and productive.
We wholeheartedly encourage you to give this DIY project a try. It’s a rewarding experience that will not only provide you with fresh, delicious bok choy but also connect you with the natural world in a meaningful way. And most importantly, don’t be afraid to experiment and personalize the process to suit your own needs and preferences.
Once you’ve created your own styrofoam bok choy garden, we’d love to hear about your experience! Share your photos, tips, and tricks in the comments below. Let’s build a community of innovative gardeners who are passionate about sustainable and creative growing methods. Your insights could inspire others to embark on their own bok choy growing adventures!
Frequently Asked Questions (FAQ)
What type of styrofoam is best to use for this project?
Ideally, you should use clean, food-grade styrofoam. This type of styrofoam is less likely to leach harmful chemicals into the water and affect the growth of your bok choy. If you’re unsure about the source of your styrofoam, it’s best to err on the side of caution and choose a new piece specifically designed for food contact. Avoid using styrofoam that has been used for packaging chemicals or other potentially harmful substances. The thicker the styrofoam, the better it will float and support the plants.
How often should I change the nutrient solution?
The frequency of changing the nutrient solution depends on several factors, including the size of your container, the temperature, and the growth rate of your bok choy. As a general rule, you should change the nutrient solution every 1-2 weeks. However, it’s important to monitor the solution regularly and change it more frequently if it becomes cloudy, develops an unpleasant odor, or if the water level drops significantly. Adding an air stone to the nutrient solution can help to keep it oxygenated and reduce the need for frequent changes.
What type of nutrient solution should I use?
You can use a commercially available hydroponic nutrient solution specifically formulated for leafy greens. These solutions typically contain a balanced blend of essential nutrients, including nitrogen, phosphorus, potassium, and micronutrients. Alternatively, you can create your own nutrient solution using readily available ingredients. There are many recipes available online, but it’s important to ensure that the solution is properly balanced to meet the needs of your bok choy. Always follow the instructions carefully when using any nutrient solution, and avoid over-fertilizing, as this can damage your plants.
How much sunlight does bok choy need when grown in styrofoam?
Bok choy thrives in full sun, requiring at least 6 hours of direct sunlight per day. However, it can also tolerate partial shade, especially during the hottest part of the day. If you’re growing your bok choy indoors, you’ll need to supplement with artificial lighting, such as grow lights. Position the lights close enough to the plants to provide adequate illumination, but not so close that they burn the leaves. Rotate the plants regularly to ensure that all sides receive equal exposure to light.
Can I use this method to grow other vegetables besides bok choy?
Yes, this method can be adapted to grow other shallow-rooted leafy greens and herbs. Lettuce, spinach, kale, basil, mint, and chives are all good candidates. However, it’s important to consider the specific needs of each plant and adjust the nutrient solution and growing conditions accordingly. For example, some plants may require more sunlight or a different pH level in the nutrient solution. Research the specific requirements of the plants you want to grow to ensure optimal growth and yield.
How do I prevent algae growth in the nutrient solution?
Algae growth is a common problem in hydroponic systems, but it can be prevented by taking a few simple precautions. First, keep the nutrient solution out of direct sunlight, as sunlight promotes algae growth. You can also use an opaque container to block light from reaching the solution. Adding a small amount of hydrogen peroxide to the nutrient solution can also help to control algae growth. Finally, regularly clean the container and the styrofoam to remove any algae that may have accumulated.
What do I do if my bok choy starts to turn yellow?
Yellowing leaves can be a sign of several problems, including nutrient deficiency, overwatering, or disease. First, check the nutrient solution to ensure that it is properly balanced and that the pH level is within the optimal range for bok choy (typically between 6.0 and 7.0). If the nutrient solution is deficient, add more fertilizer according to the instructions. If the plants are overwatered, reduce the frequency of watering and ensure that the container has adequate drainage. If you suspect a disease, inspect the plants carefully for signs of pests or fungal infections and treat accordingly.
How long does it take for bok choy to mature using this method?
The time it takes for bok choy to mature depends on several factors, including the variety of bok choy, the growing conditions, and the nutrient solution. Generally, bok choy can be harvested in about 45-60 days from planting. However, you can start harvesting the outer leaves as soon as they are large enough to eat. Regular harvesting will encourage the plant to produce more leaves and extend the harvest period.
Is this method suitable for beginners?
Absolutely! This styrofoam for bok choy growth method is incredibly beginner-friendly. It requires minimal equipment, is easy to set up, and is relatively low-maintenance. The key is to start with good quality seeds or seedlings, provide adequate sunlight and nutrients, and monitor the plants regularly for any signs of problems. With a little bit of care and attention, even novice gardeners can successfully grow bok choy using this innovative method.
Leave a Comment