

Gardenless Harvest Tips: Dreaming of fresh, homegrown goodness but lacking a sprawling backyard? Don’t let limited space squash your dreams of a bountiful harvest! For centuries, humans have found ingenious ways to cultivate food, even in the most unlikely of places. From ancient rooftop gardens in bustling cities to resourceful container gardening techniques passed down through generations, the desire to connect with nature and enjoy fresh produce has always found a way.
I’m here to tell you that you don’t need acres of land to enjoy the satisfaction of harvesting your own food. This DIY guide is packed with clever gardenless harvest tips and tricks that will transform your balcony, windowsill, or even a sunny corner of your apartment into a thriving mini-farm. Imagine plucking ripe tomatoes straight from the vine, snipping fresh herbs for your favorite recipes, or enjoying the vibrant colors of homegrown flowers – all without ever stepping foot in a traditional garden!
In today’s fast-paced world, knowing where your food comes from and having control over its quality is more important than ever. Plus, gardening, even on a small scale, is a fantastic way to relieve stress, connect with nature, and add a touch of beauty to your living space. So, let’s dive in and discover how you can unlock the secrets to a gardenless harvest and enjoy the delicious rewards of your own urban oasis!
Gardenless Harvest: Grow Your Own Food Indoors!
Hey there, fellow foodies and aspiring green thumbs! So, you’re dreaming of fresh, homegrown veggies but lack a sprawling garden? Don’t fret! I’m here to tell you that a bountiful harvest is totally achievable, even without a traditional garden. We’re diving into the wonderful world of indoor gardening, and I’m going to share some of my favorite tips and tricks to get you started. Get ready to enjoy delicious, homegrown goodness right from your windowsill!
Choosing the Right Plants
Before we get our hands dirty (or, well, not-so-dirty!), let’s talk about plant selection. Not all veggies thrive indoors, so it’s crucial to pick varieties that are well-suited for container gardening and lower light conditions. Here are some of my top recommendations:
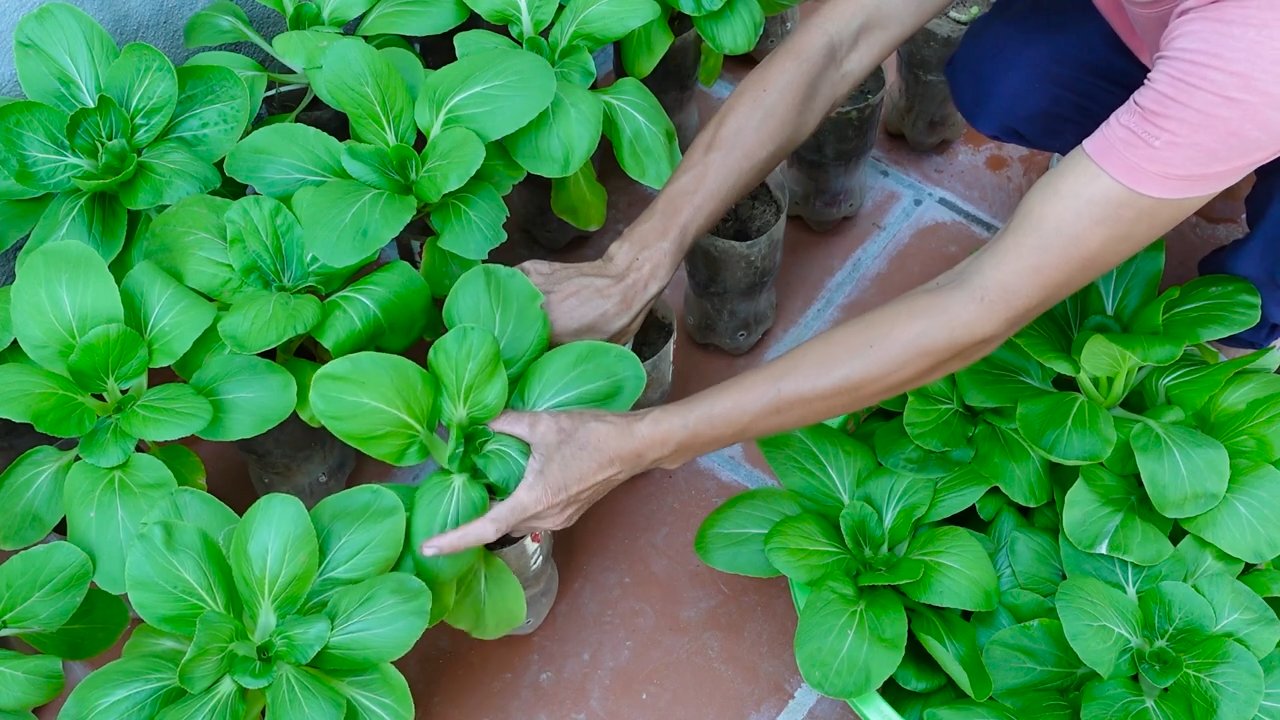
* Leafy Greens: Lettuce, spinach, kale, and arugula are super easy to grow indoors. They mature quickly and don’t require intense sunlight.
* Herbs: Basil, mint, parsley, chives, oregano, and thyme are fantastic choices. They add flavor to your dishes and are relatively low-maintenance.
* Tomatoes: Dwarf or bush tomato varieties are perfect for containers. Look for names like ‘Tiny Tim,’ ‘Roma,’ or ‘Patio.’
* Peppers: Similar to tomatoes, opt for compact pepper varieties like ‘Sweet Palermo,’ ‘Jalapeno,’ or ‘Thai Chili.’
* Radishes: These fast-growing root vegetables are a great option for beginners.
* Scallions: You can even regrow scallions from the ones you buy at the store!
* Microgreens: These are super easy and quick to grow, providing a burst of flavor and nutrients in just a few days.
Setting Up Your Indoor Garden
Okay, now for the fun part – creating your indoor oasis! Here’s what you’ll need:
* Containers: Choose pots that are at least 6 inches deep for leafy greens and herbs, and 12 inches deep for tomatoes and peppers. Make sure they have drainage holes!
* Potting Mix: Use a high-quality potting mix specifically designed for containers. Avoid using garden soil, as it can compact and drain poorly.
* Light: This is crucial! If you don’t have a sunny windowsill (south-facing is ideal), you’ll need to invest in grow lights. LED grow lights are energy-efficient and work wonders.
* Watering Can: A watering can with a long spout will help you water your plants gently and evenly.
* Fertilizer: A balanced liquid fertilizer will provide your plants with the nutrients they need to thrive.
* Spray Bottle: For misting your plants, especially herbs and leafy greens.
* Optional: Plant labels, small gardening tools, a humidity tray.
Step-by-Step Planting Guide
Alright, let’s get planting! I’m going to walk you through the process, step by step.
Planting Seeds
1. Prepare Your Containers: Fill your containers with potting mix, leaving about an inch of space at the top.
2. Sow the Seeds: Follow the instructions on your seed packet for planting depth and spacing. Generally, you’ll want to make small indentations in the soil, place the seeds in, and gently cover them with soil.
3. Water Gently: Water the soil gently using a watering can or spray bottle. Avoid overwatering, as this can lead to seed rot.
4. Provide Light: Place your containers in a sunny windowsill or under grow lights. If using grow lights, position them a few inches above the soil surface.
5. Maintain Moisture: Keep the soil consistently moist, but not soggy. You can cover the containers with plastic wrap or a humidity dome to help retain moisture.
6. Wait Patiently: Germination times vary depending on the plant species. Be patient and keep an eye on your seedlings.
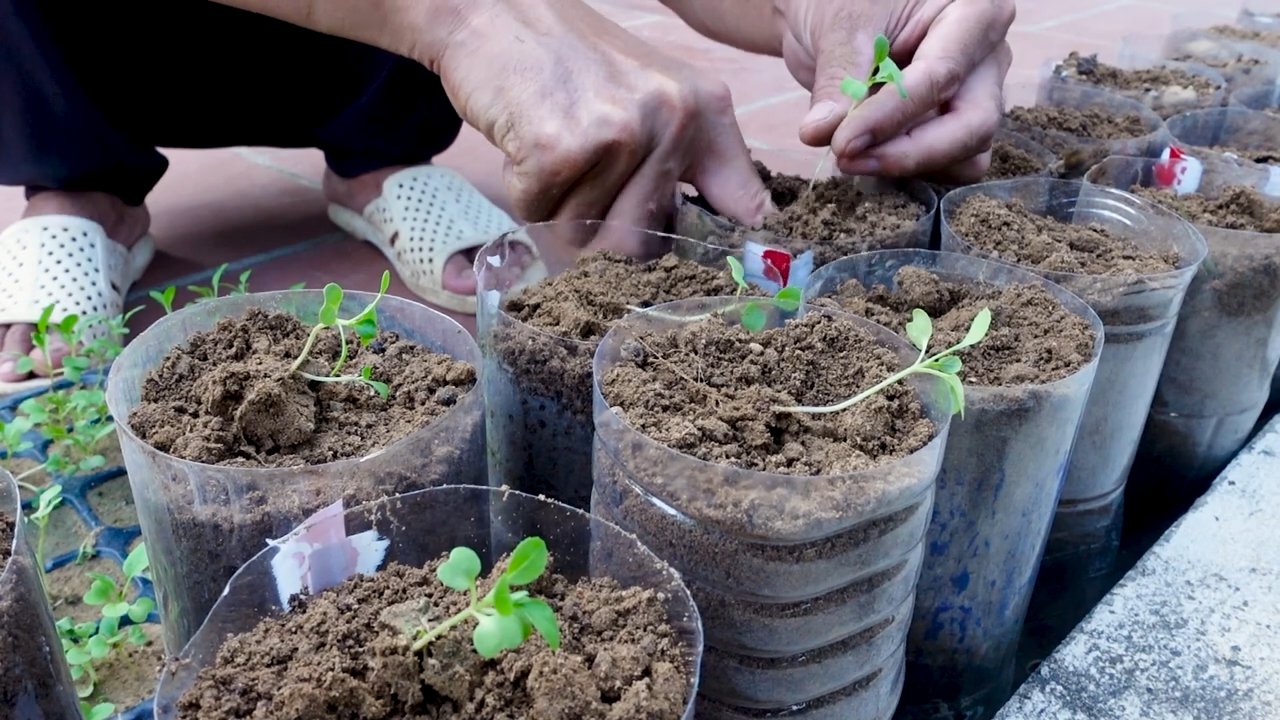
Transplanting Seedlings (if starting indoors)
1. Harden Off Seedlings: If you started your seeds indoors, you’ll need to “harden them off” before transplanting them into larger containers. This means gradually exposing them to outdoor conditions (sunlight, wind, temperature) for a week or two. Start by placing them outside for an hour or two each day, and gradually increase the time.
2. Prepare Your Containers: Fill your larger containers with potting mix, leaving about an inch of space at the top.
3. Carefully Remove Seedlings: Gently remove the seedlings from their starter containers, being careful not to damage the roots.
4. Plant the Seedlings: Make a hole in the potting mix large enough to accommodate the seedling’s root ball. Place the seedling in the hole and gently backfill with soil.
5. Water Thoroughly: Water the seedlings thoroughly after transplanting.
6. Provide Support (if needed): For taller plants like tomatoes and peppers, you may need to provide support with stakes or cages.
Caring for Your Indoor Garden
Now that your plants are happily growing, it’s time to provide them with the care they need to thrive.
* Watering: Water your plants regularly, but avoid overwatering. The frequency of watering will depend on the plant species, the size of the container, and the environmental conditions. A good rule of thumb is to water when the top inch of soil feels dry to the touch.
* Fertilizing: Feed your plants with a balanced liquid fertilizer every two to four weeks. Follow the instructions on the fertilizer label.
* Light: Ensure your plants are getting enough light. If you’re using grow lights, adjust the height as your plants grow.
* Pruning: Prune your plants regularly to encourage bushier growth and remove any dead or yellowing leaves.
* Pest Control: Keep an eye out for pests like aphids, spider mites, and whiteflies. If you spot any pests, treat them with insecticidal soap or neem oil.
* Pollination (for tomatoes and peppers): Indoor tomatoes and peppers may need help with pollination. You can gently shake the plants or use a small paintbrush to transfer pollen from one flower to another.
Troubleshooting Common Issues
Even with the best care, you might encounter some challenges along the way. Here are some common issues and how to address them:
* Yellowing Leaves: This could be a sign of overwatering, underwatering, nutrient deficiency, or pest infestation. Check the soil moisture, fertilize your plants, and inspect them for pests.
* Leggy Growth: This is usually caused by insufficient light. Move your plants to a sunnier location or provide them with more grow light.
* Slow Growth: This could be due to nutrient deficiency, poor soil, or inadequate watering. Fertilize your plants, repot them with fresh potting mix, and adjust your watering schedule.
* Pests: As mentioned earlier, keep an eye out for pests and treat them promptly.
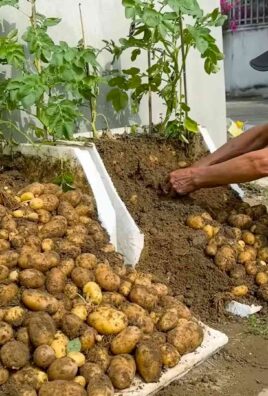
Harvesting Your Bounty
The moment you’ve been waiting for – harvesting your homegrown goodies!
* Leafy Greens: Harvest leafy greens when the leaves are large enough to eat. You can harvest individual leaves or cut the entire plant at the base.
* Herbs: Harvest herbs as needed. Pinch off the leaves or stems to encourage bushier growth.
* Tomatoes and Peppers: Harvest tomatoes and peppers when they are fully ripe and have reached their mature color.
* Radishes: Harvest radishes when they are about an inch in diameter.
* Scallions: Harvest scallions when they are about 6-8 inches tall.
* Microgreens: Harvest microgreens when they have developed their first set of true leaves. Simply snip them off at the base.
Specific Plant Tips
Here are a few extra tips for some of the plants I mentioned earlier:
* Tomatoes: Provide support with stakes or cages. Pinch off suckers (the small shoots that grow between the main stem and the branches) to encourage fruit production.
* Peppers: Pinch off the first few flowers to encourage bushier growth and higher yields.
* Basil: Pinch off the flower buds to encourage leaf production.
* Mint: Mint is a vigorous grower, so it’s best to grow it in its own container to prevent it from taking over your other plants.
Maximizing Your Indoor Garden Space
If you’re short on space, here are some ideas for maximizing your indoor garden:
* Vertical Gardening: Use vertical planters, hanging baskets, or wall-mounted shelves to create a vertical garden.
* Stackable Planters: Stackable planters allow you to grow multiple plants in a small footprint.
* Windowsill Gardens: Utilize your windowsills to grow herbs and leafy greens.
* Grow Lights: Grow lights allow
Conclusion
So, there you have it! Transforming your kitchen scraps into a thriving indoor garden is not just a fun project; it’s a sustainable, cost-effective, and incredibly rewarding way to bring fresh produce into your home, even without a traditional garden. This “Gardenless Harvest Tips” approach is a game-changer for apartment dwellers, urban foodies, and anyone looking to reduce waste and connect with the natural world.
Why is this a must-try? Because it’s more than just growing food; it’s about understanding the life cycle, minimizing your environmental footprint, and enjoying the unparalleled flavor of homegrown herbs and vegetables. Imagine snipping fresh basil for your pasta sauce, adding vibrant green onions to your salad, or garnishing your tacos with cilantro, all grown from scraps you would have otherwise thrown away. The satisfaction is immense!
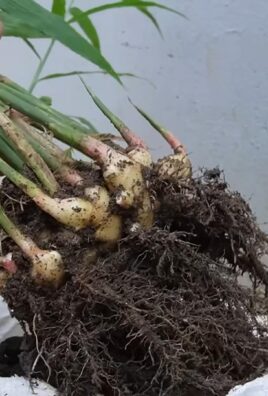
But don’t stop there! Experiment with different vegetables and herbs. Try regrowing romaine lettuce, celery, or even ginger. Consider using different containers – from repurposed glass jars to stylish ceramic pots – to match your home decor. You can also explore different growing mediums, such as coco coir or perlite, to optimize growth. The possibilities are endless!
We encourage you to dive in and give these Gardenless Harvest Tips a try. It’s easier than you think, and the rewards are well worth the effort. Start small, be patient, and don’t be afraid to experiment. Most importantly, have fun!
Once you’ve experienced the joy of regrowing your own food, we’d love to hear about your journey. Share your successes, your challenges, and your creative variations with us in the comments below. Let’s build a community of indoor gardeners and inspire others to embrace this sustainable and delicious way of life. Let us know what worked for you, what didn’t, and any tips you’ve discovered along the way. Your experiences can help others succeed and further refine these Gardenless Harvest Tips for everyone.
Remember, even small steps towards sustainability can make a big difference. By embracing these simple techniques, you’re not only growing your own food but also contributing to a more environmentally conscious lifestyle. So, grab your kitchen scraps, get your hands dirty (or not, depending on your method!), and start your indoor garden today. Happy growing!
Frequently Asked Questions (FAQ)
What types of vegetables and herbs are easiest to regrow from scraps?
Some of the easiest vegetables and herbs to regrow from scraps include green onions, lettuce (especially romaine), celery, basil, cilantro, mint, and ginger. These tend to root and sprout relatively quickly and require minimal effort. Root vegetables like carrots and beets can also be regrown for their greens, although they won’t produce new root vegetables. Experimentation is key, so don’t be afraid to try regrowing other scraps as well.
How much sunlight do my regrown vegetables and herbs need?
Most regrown vegetables and herbs thrive in bright, indirect sunlight. A windowsill that receives several hours of sunlight per day is ideal. If you don’t have access to enough natural light, you can supplement with a grow light. Position the grow light a few inches above the plants and keep it on for 12-16 hours per day. Observe your plants closely and adjust the light as needed. Leggy growth (long stems with few leaves) indicates insufficient light.
What kind of water should I use for regrowing vegetables and herbs?
Tap water is generally fine for regrowing vegetables and herbs, but it’s best to let it sit out for 24 hours to allow chlorine to evaporate. Alternatively, you can use filtered water or rainwater. Avoid using softened water, as it can contain high levels of sodium, which can be harmful to plants. When watering, make sure the soil is evenly moist but not waterlogged. Overwatering can lead to root rot.
How often should I water my regrown vegetables and herbs?
The frequency of watering depends on several factors, including the type of plant, the size of the container, the growing medium, and the ambient temperature and humidity. As a general rule, water when the top inch of soil feels dry to the touch. Check the soil moisture regularly and adjust your watering schedule accordingly. During hot, dry weather, you may need to water more frequently.
What kind of soil should I use for planting regrown vegetables and herbs?
A well-draining potting mix is ideal for planting regrown vegetables and herbs. Avoid using garden soil, as it can be too heavy and compact, which can hinder root growth. You can also amend your potting mix with compost or other organic matter to improve its fertility and drainage. Consider using a soilless mix, such as coco coir or perlite, for certain plants, especially those that are prone to root rot.
How long does it take for vegetables and herbs to regrow from scraps?
The time it takes for vegetables and herbs to regrow from scraps varies depending on the type of plant and the growing conditions. Some plants, like green onions, can start to regrow within a few days. Others, like celery, may take a week or two to show signs of growth. Be patient and continue to provide the plants with adequate light, water, and nutrients.
Can I use fertilizer to help my regrown vegetables and herbs grow?
Yes, you can use fertilizer to help your regrown vegetables and herbs grow, but it’s important to use it sparingly. Over-fertilizing can damage the plants. A diluted liquid fertilizer, such as fish emulsion or seaweed extract, is a good option. Apply the fertilizer every few weeks, following the instructions on the label. You can also add compost or other organic matter to the soil to provide a slow-release source of nutrients.
What if my regrown vegetables and herbs start to turn yellow or brown?
Yellowing or browning leaves can be a sign of several problems, including overwatering, underwatering, nutrient deficiencies, or pest infestations. Check the soil moisture and adjust your watering schedule accordingly. If the soil is too wet, allow it to dry out slightly before watering again. If the soil is too dry, water thoroughly. If you suspect a nutrient deficiency, try fertilizing with a diluted liquid fertilizer. Inspect the plants for pests and treat them accordingly.
How do I prevent pests and diseases from affecting my regrown vegetables and herbs?
To prevent pests and diseases from affecting your regrown vegetables and herbs, start with healthy plants and provide them with optimal growing conditions. Ensure good air circulation to prevent fungal diseases. Inspect the plants regularly for pests and diseases and take action promptly if you notice any problems. You can use organic pest control methods, such as insecticidal soap or neem oil, to control pests.
Can I regrow vegetables and herbs indefinitely from scraps?
While you can regrow many vegetables and herbs multiple times from scraps, the quality and yield may decline over time. Eventually, the plants may become less productive or more susceptible to pests and diseases. It’s a good idea to start new plants from seeds or cuttings periodically to ensure a continuous supply of fresh produce. However, the process of regrowing from scraps can be repeated many times, making it a sustainable practice.
Leave a Comment